We all are fond of WYSIWYG editors as they simplify the tasks. Take example of Summernote which is minimalistic yet very effective in many ways. We can make use of Summernote editor by either using a download link or just using CDN links for any web app we want. In this tutorial we will understand how we can use Summernote to upload images on a server for Laravel 9 Bootstrap 5.
We are using it here for a blog post and it will show you how to integrate Summernote for any Laravel 9 app along with uploading in-article images of your choice. Each step is shown with examples below to make a better understanding and you can easily follow the track. So let’s get done with it.
#1 Create A New Laravel App
We are going to use composer command to create a new Laravel application in this first step. First of all, open the Terminal or CMD copy/paste the following command for it
composer create-project --prefer-dist laravel/laravel articleIt will generate it and now we need to change the Terminal directory Laravel by typing following in the command line
cd article#2 The Next We Need to Configure MySQLdb in .env file
Hence, we have created the Laravel app the next we have to open that app in a text editor. So let’s open the .env file (environment) in the root directory to change the MySQL database credentials to configure it which we have shown below
DB_CONNECTION=mysql
DB_HOST=127.0.0.1
DB_PORT=3306
DB_DATABASE=article
DB_USERNAME=root
DB_PASSWORD=secret
#3 Create A Migration File
The next we need to create a migration file for our article table. Type the following artisan command in your Terminal which will create it
php artisan make:migration create_articles_tableIt will create the migration file in the database directory. Now open the file we just created for migration and add two new fields with up() method which are actually table fields. See below this step carefully how we have done it
<?php

use Illuminate\Database\Migrations\Migration;
use Illuminate\Database\Schema\Blueprint;
use Illuminate\Support\Facades\Schema;

class CreateArticlesTable extends Migration
{
    /**
     * Run the migrations.
     *
     * @return void
     */
    public function up()
    {
        Schema::create('articles', function (Blueprint $table) {
            $table->id();
            $table->string('title');
            $table->text('description');
            $table->timestamps();
        });
    }

    /**
     * Reverse the migrations.
     *
     * @return void
     */
    public function down()
    {
        Schema::dropIfExists('articles');
    }
}
Now wee need to run the migration command.
#4 Next Create Article Model Class
Now we need a model class without which we cannot run eloquent query. We have to run eloquent query and as a controller class is used to execute the database queries through Model class we need to create a new model. So run the following command in your Terminal to do that
php artisan make:model ArticleNow we need to open the model class at app/models/article.php file and add $fillabe attribute into that class which will tell the app which fields can be mass assigned; Let’s see below
<?php

namespace App\Models;

use Illuminate\Database\Eloquent\Factories\HasFactory;
use Illuminate\Database\Eloquent\Model;

class Article extends Model
{
    use HasFactory;

    /**
     * The attributes that are mass assignable.
     *
     * @var string[]
     */
    protected $fillable = [
        'title',
        'description',
    ];
}
#5 Now Let’s Create A Controller Class
The next we need to create the controller class to implement the logic in app which will use it for database query and the browser will get a response through it. Copy and paste the following artisan command for creating Controller
php artisan make:controller ArticleControllerNow we will implement the article list to create and show article. So open the controller class with app/Http/Controllers/ArticleController.php and insert the following code in it.
<?php

namespace App\Http\Controllers;

use File;
use App\Models\Article;
use Illuminate\Http\Request;

class ArticleController extends Controller
{
    /**
     * The article list view.
     *
     * @return Illuminate\Http\View
     */
    public function index()
    {
        $articles = Article::get();

        return view('articles.index', compact('articles'));
    }

    /**
     * The article view.
     *
     * @return Illuminate\Http\View
     */
    public function show($id)
    {
        $article = Article::where('id', $id)
            ->first();

        return view('articles.show', compact('article'));
    }

    /**
     * The article create view.
     *
     * @return Illuminate\Http\View
     */
    public function create()
    {
        return view('articles.create');
    }

    /**
     * The article create view.
     *
     * @return Illuminate\Http\View
     */
    public function store(Request $request)
    {
        $validated = $request->validate([
             'title' => 'required',
             'description' => 'required'
        ]);

        $dom = new \DomDocument();
        $dom->loadHtml($validated['description'], LIBXML_HTML_NOIMPLIED | LIBXML_HTML_NODEFDTD);
        $image_file = $dom->getElementsByTagName('img');

        if (!File::exists(public_path('uploads'))) {
            File::makeDirectory(public_path('uploads'));
        }

        foreach($image_file as $key => $image) {
            $data = $image->getAttribute('src');

            list($type, $data) = explode(';', $data);
            list(, $data) = explode(',', $data);

            $img_data = base64_decode($data);
            $image_name = "/uploads/" . time().$key.'.png';
            $path = public_path() . $image_name;
            file_put_contents($path, $img_data);

            $image->removeAttribute('src');
            $image->setAttribute('src', $image_name);
        }

        $validated['description'] = $dom->saveHTML();

        Article::create($validated);

        return redirect()
            ->route('article.index')
            ->with('success', 'Article created successfully.');
    }
}
Methods Explained:
index() method show the list of articles.
show() method will show the single article.
create() method will show create article form view.
store() method will save image and article.
#6 Let’s Create New Routes
As we have already created a new controller and added methods as well. The next, we are going to create Routes for controller
<?php

use Illuminate\Support\Facades\Route;
use App\Http\Controllers\ArticleController;

Route::get('article/index', [ArticleController::class, 'index'])->name('article.index');
Route::get('article/show/{id}', [ArticleController::class, 'show'])->name('article.show');
Route::get('article/create', [ArticleController::class, 'create'])->name('article.create');
Route::post('article/store', [ArticleController::class, 'store'])->name('article.store');
#7 Next We Need to Create Blade Views
We have gone all the necessary steps now, we need to create blade views for the list of articles and create, form and show. As we know that Laravel views get stored in resources/views directory, so we need to create articles folder into it and the view files shown below in the directory.
resources/views/articles/
-index.blade.php
-show.blade.php
-create.blade.php
index.blade.php
index.blade.php
<!DOCTYPE html>
<html>
<head>
    <meta charset="utf-8">
    <title>Articles</title>
    <link href="https://cdn.jsdelivr.net/npm/[email protected]/dist/css/bootstrap.min.css" rel="stylesheet">
</head>
<body>
    <div class="container">
        <div class="row">
            <h1 class="text-center">ALL Articles</h1>
            <div class="mb-3">
                <a class="btn btn-primary" href="{{ route('article.create') }}">New Article</a>
            </div>
            <div class="col-12">
                <table class="table table-hover">
                    <thead>
                        <tr>
                            <th>#</th>
                            <th>Title</th>
                            <th>Description</th>
                            <th>Action</th>
                        </tr>
                    </thead>
                    <tbody>
                        @foreach($articles as $article)
                            <tr>
                                <th scope="row">{{ $article->id }}</th>
                                <td>{{ $article->title }}</td>
                                <td>{{ substr($article->description, 0, 10) }}</td>
                                <td>
                                    <a href="{{ route('article.show', $article->id) }}" class="btn btn-secondary">View</a>
                                </td>
                            </tr>
                        @endforeach
                    </tbody>
                </table>
            </div>
        </div>
    </div>
</body>
</html>
show.blade.php
<!DOCTYPE html>
<html>
<head>
    <meta charset="utf-8">
    <title>{{ $article->title }}</title>
    <link href="https://cdn.jsdelivr.net/npm/[email protected]/dist/css/bootstrap.min.css" rel="stylesheet">
</head>
<body>
    <div class="container">
        <div class="row">
            <h1 class="text-center">{{ $article->title }}</h1>
            <div class="col-12">{!! $article->description !!}</div>
        </div>
        <div class="mt-3">
            <a class="btn btn-primary" href="{{ route('article.index') }}">Back</a>
        </div>
    </div>
</body>
</html>
create.blade.php
<!DOCTYPE html>
<html>
<head>
    <meta charset="utf-8">
    <title>Create Article</title>
    <link href="https://cdn.jsdelivr.net/npm/[email protected]/dist/css/bootstrap.min.css" rel="stylesheet">
    <link rel="stylesheet" href="https://cdnjs.cloudflare.com/ajax/libs/summernote/0.8.18/summernote.min.css" />
</head>
<body>
    <div class="container">
        <div class="row">
            <h1 class="text-center">Create Article</h1>
            <div class="col-12">
                <form method="post" action="{{ route('article.store') }}">
                    @csrf
                    <div class="mb-3">
                        <label for="title" class="form-label">Title</label>
                        <input type="text" class="form-control" id="title" name="title">
                        @error('title')
                            <div class="mt-1 alert alert-danger">{{ $message }}</div>
                        @enderror
                    </div>
                    <div class="mb-3">
                        <label for="description" class="form-label">Description</label>
                        <textarea class="form-control" id="description" name="description"></textarea>
                        @error('description')
                            <div class="mt-1 alert alert-danger">{{ $message }}</div>
                        @enderror
                    </div>
                    <div>
                        <input type="submit" class="btn btn-primary">
                        <a class="btn btn-danger" href="{{ route('article.index') }}">Back</a>
                    </div>
                </form>
            </div>
        </div>
    </div>
    <script src="https://code.jquery.com/jquery-3.6.0.min.js"></script>
    <script src="https://cdn.jsdelivr.net/npm/[email protected]/dist/js/bootstrap.bundle.min.js"></script>
    <script src="https://cdnjs.cloudflare.com/ajax/libs/summernote/0.8.18/summernote.min.js"></script>
    <script type="text/javascript">
        $(document).ready(function() {
            $('#description').summernote({
                height: 500,
            });
        });
    </script>
</body>
</html>
Thus now we have followed all the necessary steps and made the necessary changes so our coding part is done. Now we need to test the app and see changes we have done are executed properly. Use the following artisan command to start Laravel.
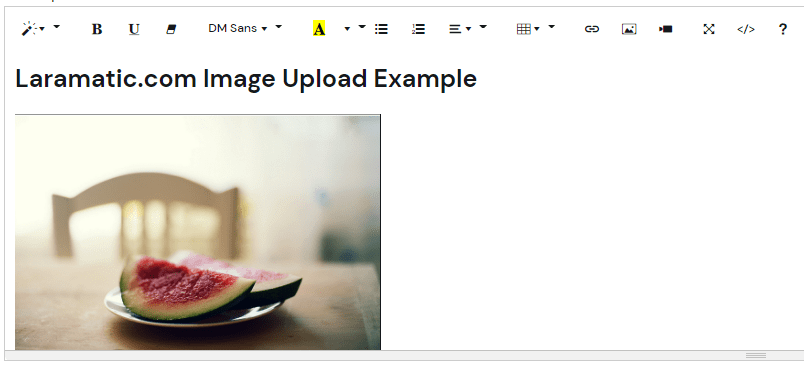
php artisan serveNow, open this test link in your browser http://localhost:8000/article/index. Create new articles, add image into article and save the article.
Finally you can see how our application looks for the each feature below
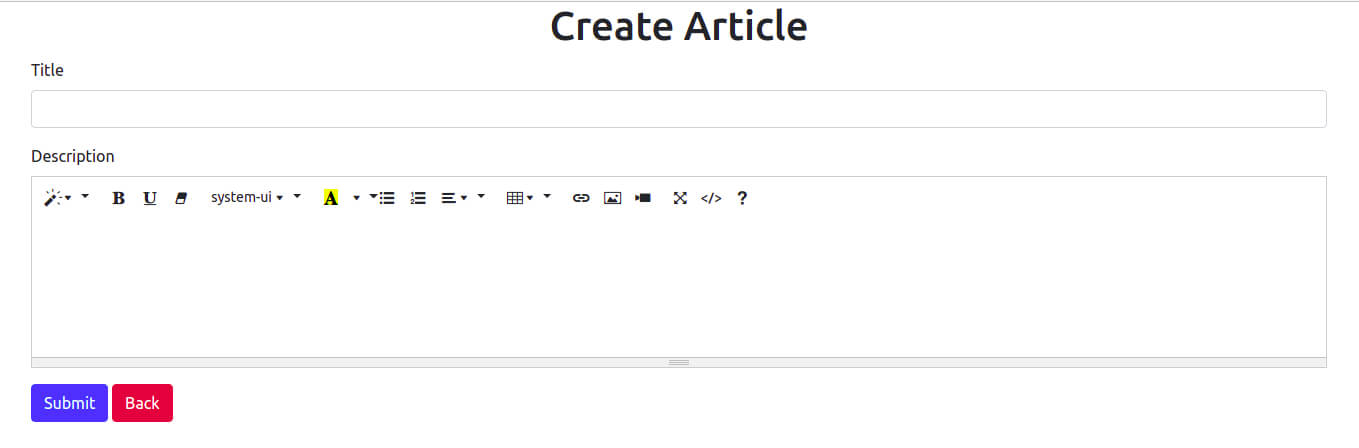
Create article
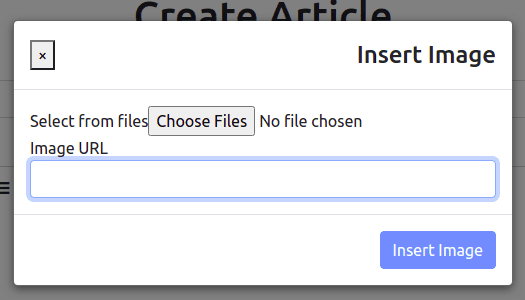
Here is Upload Image Feature
List of Articles

Show Article
So this way by following these steps we can integrate Summernote editor and save in-article images on Laravel 9.
Please Note if Summernote does not work with bootstrap 5 use lite version of summernote which does not require any CSS framework. Here is the complete list of Summernote resources.

