Today, we are explaining how to Drag and Drop Image Upload using Dropzone JS in Laravel 9?. In this tutorial, you will learn how to drag & drop multiple images to upload with dropzone js in Laravel 9. This comprehensive Laravel 9 file uploading tutorial helps you create drag and drop functionality for uploading multiple files or images using the Dropzone js plugin. Undoubtedly, it is lightweight, and most importantly, it doesn’t require an external library (such as jQuery). Throughout this tutorial, we’ll show you by example how to use Dropzone.js in Laravel 9.
DropzoneJS is a popular and profound open-source library that allows you to drag ’n’ drop file uploads with image previews. Let’s see how to use Dropzone.js step by step with Laravel 9 to implement multiple file and image uploads with progress bars and image previews.
In the following example, we will be using two routes for displaying and storing images, A controller with two methods and a blade file to place the page’s HTML and Dropzone js Plugin. Following are the steps:
Step 1: Creating Laravel Project
composer create-project laravel/laravel Dropzone
Step 2: Creating Controller
Now we will create a controller with the name DropzoneJsController and then we will add two methods for viewing and storing multiple images. The storage point for all images will be the “Public” directory of the project.
Let’s create and write the logic into the controller:
to create the controller we will run
php artisan make:controller DropzoneJsControllerWe have created a controller now let’s create methods in it:
<?php

namespace App\Http\Controllers;

use Illuminate\Http\Request;

class DropzoneJsController extends Controller
{
    /**
     * Generate Image upload View
     *
     * @return void
     */
    public function index()
    {
        return view('dropzone');
    }

    /**
     * Image Upload Code
     *
     * @return void
     */
    public function store(Request $request)
    {
        $img = $request->file('file');

        $imgName = time().'.'.$image->extension();
        $img->move(public_path('images'),$imgName);

        return response()->json(['success'=>$imgName]);
    }
}
Step 3: Adding Routes
Furthermore, we will be creating routes for viewing and storing images in the “routs/web.php” file and adding the following routs.
routes/web.php
<?php

use Illuminate\Support\Facades\Route;

use App\Http\Controllers\DropzoneController;

/*
|--------------------------------------------------------------------------
| Web Routes
|--------------------------------------------------------------------------
|
| Here is where you can register web routes for your application. These
| routes are loaded by the RouteServiceProvider within a group which
| contains the "web" middleware group. Now create something great!
|
*/


    Route::get('dropzone', 'DropzoneJsController@index');
    Route::post('dropzone/store', 'DropzoneJsController@store')->name('dropzone.store');
Step 4: Adding dropzone.blade File
Finally, we will dropzone.blade.php file in the “recourses/views” directory and will write the code of uploading images using dropzone.js.
resources/views/dropzone.blade.php
<!DOCTYPE html>
<html>
<head>
<title> uploading image by drag and drop using Dropzone JS in Laravel 9 - laramatic.com </title>
<link href="https://cdn.jsdelivr.net/npm/[email protected]/dist/css/bootstrap.min.css" rel="stylesheet">
<script src="https://unpkg.com/dropzone@5/dist/min/dropzone.min.js"></script>
<link rel="stylesheet" href="https://unpkg.com/dropzone@5/dist/min/dropzone.min.css" type="text/css" />
</head>
<body>
<div class="container">
<div class="row">
<div class="col-md-12">
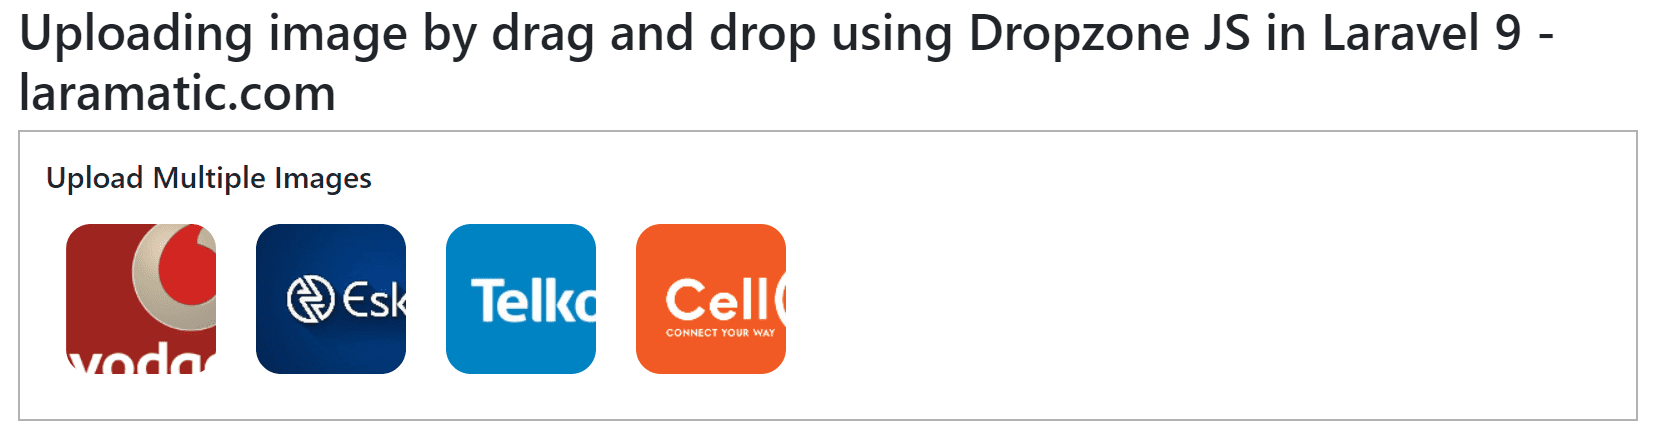
<h1>Uploading Image by Drag & Drop Using Dropzone JS in Laravel 9 - Laramatic.com</h1>
<form action="{{ route('dropzone.store') }}" method="post" enctype="multipart/form-data" id="image-upload" class="dropzone">
@csrf
<div>
<h4>Upload Multiple Images</h4>
</div>
</form>
</div>
</div>
</div>
<script type="text/javascript">
Dropzone.autoDiscover = false;
var dropzone = new Dropzone('#image-upload', {
thumbnailWidth: 200,
maxFilesize: 12,
acceptedFiles: ".jpeg,.jpg,.png,.gif"
});
</script>
</body>
</html>Now let’s go through each option.
- maxFilesize is set to 12. Dropzone will only allow images with a size of less than 12MB. You can make it smaller or higher based on your requirements.
- renameFile function renames the file before uploading it to the server.
-
acceptedFiles checks the file’s mime type or extension against this list. We define .jpeg,.jpg,.png,.gif. You can change based on your needs.
- addRemoveLinks is set to true. Dropzone will display the Remove button to remove our uploaded file.
Step 5: Running the App
Finally, we are finished with the coding and now let’s run the app using the following command.
php artisan serveTherefore let’s go to the browser and enter the following URL to see the app result.
http://localhost:8000/dropzoneOutput:
I hope after this you will have the idea of how to implement drag and drop file uploading using dropzone.js in laravel 9.

