In this tutorial we will learn the implementation of autocomplete search using jquery UI in laravel 9 with the help of simple steps to understand it fully.
To do that, we are going to create a fresh project inside a laravel 9 first. Secondly, we will create a database model, factory, and migration for the student table, and then using tinker we will insert dummy data inside the table. Thirdly, we will create a controller to place the logic inside it for database queries processing and at last we will create a blade file which will contain the fronted code and the Jquery UI logic inside.
so let’s go through the example step by step.
Step 1:Creating the project
composer create-project laravel/laravel SearchUIStep 2: Creating migration, factory, and model
php artisan make:model Subject mfThis command will create a model, migration, and a factory for the subject. Let’s navigate through their respective directories and write the logic inside them.
/database/migrations/2021_05_27_100722_create_subjects_table.php
<?php

use Illuminate\Database\Migrations\Migration;
use Illuminate\Database\Schema\Blueprint;
use Illuminate\Support\Facades\Schema;

class CreateSubjectTable extends Migration
{
    /**
     * Run the migrations.
     *
     * @return void
     */
    public function up()
    {
        Schema::create('subjects', function (Blueprint $table) {
            $table->id();
            $table->string('name');
            $table->timestamps();
        });
    }
    /**
     * Reverse the migrations.
     *
     * @return void
     */
    public function down()
    {
        Schema::dropIfExists('students');
    }
}
Now we need to run the migration using the following command:
php artisan migrate/Database/Factories/SubjectFactory.php
<?php

namespace Database\Factories;

use Illuminate\Database\Eloquent\Factories\Factory;

class SsubjectFactory extends Factory
{
    /**
     * Define the model's default state.
     *
     * @return array
     */
    public function definition()
    {
        return [
            'name' => $this->faker->name(),


        ];
    }
}
/App/Models/Subject.php
<?php

namespace App;

use Illuminate\Database\Eloquent\Model;

class Subject extends Model
{
    /**
     * Write code on Method
     *
     * @return response()
     */
     protected $fillable = [
        'name'
    ];
}
Step 3: Injecting dummy students
We will inject dummy data using the PHP tinker command.
php artisan tinker

Subject::factory()->count(20)->create()
Step 4: Creating routs
Then we will create two routes, one for indexing the page and the other to process ajax requests for searching in the database asynchronously.
<?php
use App\Http\Controllers\SubjectController;
use Illuminate\Support\Facades\Route;

/*
|--------------------------------------------------------------------------
| Web Routes
|--------------------------------------------------------------------------
|
| Here is where you can register web routes for your application. These
| routes are loaded by the RouteServiceProvider within a group which
| contains the "web" middleware group. Now create something great!
|
*/

Route::get('/', [SubjectController::class, 'index']);
Route::get('/subjectSearch', [SubjectController::class, 'subjectSearch'])->name('subjectSearch');
Step 4: Create Controller
In this step we will create StudentController using the command below:
php artisan make:controller <code class="language-php">SubjectControllerNow in this controller, we will create 2 methods:
- index()
subjectSearch()
app/Http/Controllers/AutocompleteController.php
<?php

namespace App\Http\Controllers;

use Illuminate\Http\Request;
use App\Models\User;

class <code class="language-">SubjectController extends Controller { /** * Display a listing of the resource. * * @return \Illuminate\Http\Response */ public function index() { return view('welcome'); } /** * Show the form for creating a new resource. * * @return \Illuminate\Http\Response */ public function subjectSearch(Request $request) { $data = User::select("name as value", "id") ->where('name', 'LIKE', '%'. $request->get('search'). '%') ->get(); return response()->json($data); } }
Step 5:Create Blade File
<!DOCTYPE html>
<html>
    <head>
        <title>Laravel 9 jQuery UI autocomplete ajax search - Laramatic.com</title>
        <link href="https://cdn.jsdelivr.net/npm/[email protected]/dist/css/bootstrap.min.css" rel="stylesheet">
        <link rel="stylesheet" href="https://cdnjs.cloudflare.com/ajax/libs/jqueryui/1.12.1/jquery-ui.min.css" />
        <script src="https://cdnjs.cloudflare.com/ajax/libs/jquery/3.6.0/jquery.min.js"></script>
        <script src="https://cdnjs.cloudflare.com/ajax/libs/jqueryui/1.12.1/jquery-ui.min.js"></script>
    </head>
<body>
    <div class="container mt-4">
        <div class="row">
          <div class="col-md-10 mx-auto">
            <div class="card">
              <div class="card-header bg-dark text-white text-center">
                <h4>Laravel 9 jQuery UI autocomplete ajax search - Laramatic.com</h4>
              </div>
              <div class="card-body">
                <div class="row">
                  <div class="col-md-12">
                    <input class="itemName form-control" id="search" type="text">
                  </div>
                </div>
              </div>
            </div>
          </div>
        </div>
      </div>


<script type="text/javascript">
    var path = "{{ route('subjectSearch') }}";

    $( "#search" ).subjectSearch({
        source: function( request, response ) {
          $.ajax({
            url: path,
            type: 'GET',
            dataType: "json",
            data: {
               search: request.term
            },
            success: function( data ) {
               response( data );
            }
          });
        },
        select: function (event, ui) {
           $('#search').val(ui.item.label);
           return false;
        }
      });

</script>

</body>
</html>
Finally, we are ready to run our app and see the results, so run the following command:
php artisan serveLet’s open the below URL in the browser and see the results.
http://localhost:8000Output:
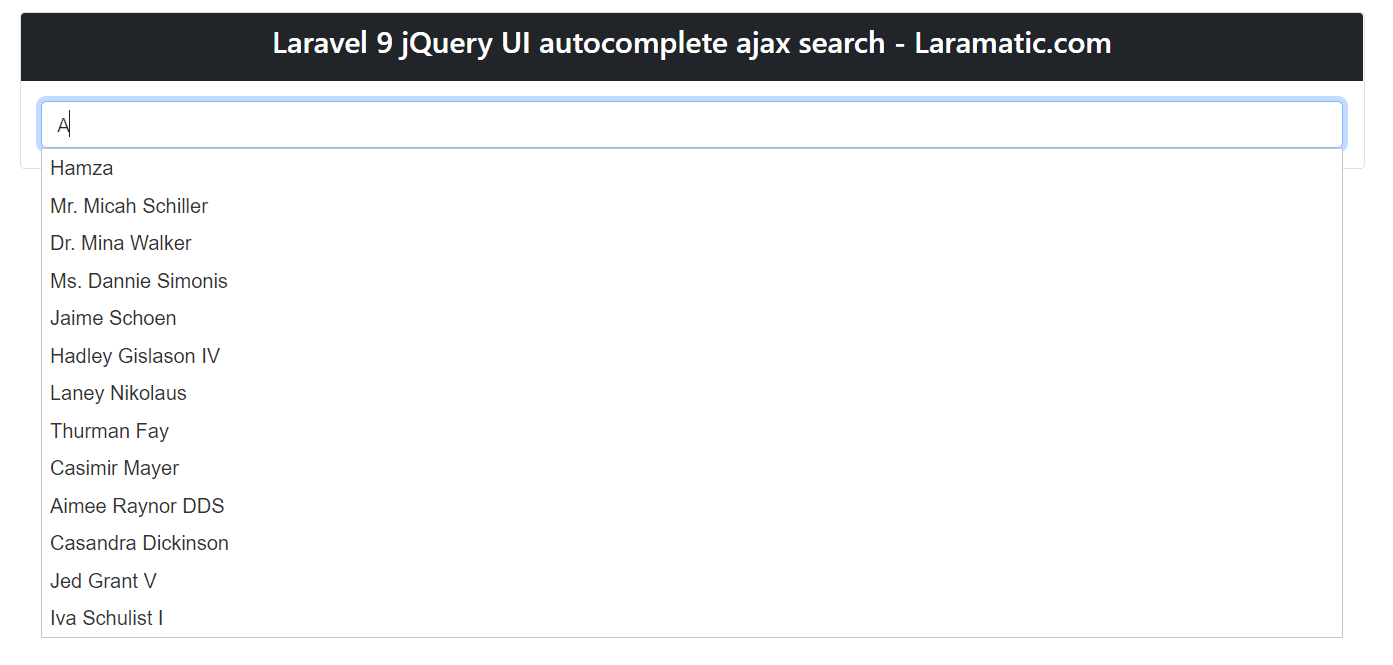
Let’s hope that this tutorial will be helpful in learning about the implementation of autocomplete search using jquery UI in laravel 9

